COOKIE RECIPE: OLD FASHIONED PECAN SANDIES

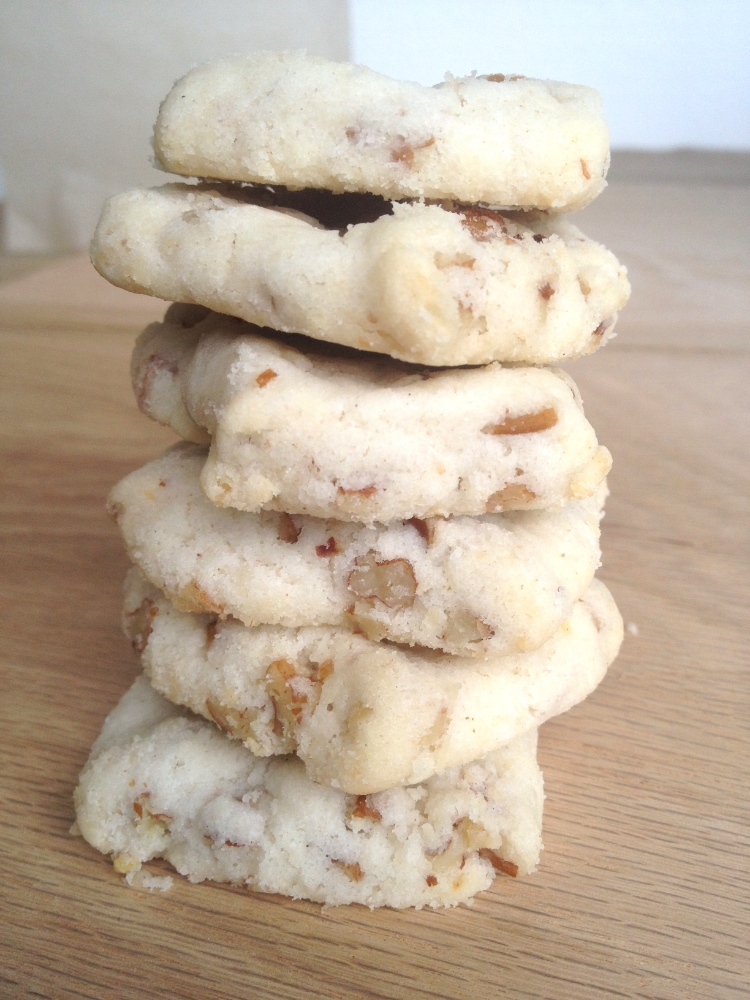
My dad has always loved these cookies! Pecan Sandies are a such classic and I had totally forgotten about them until I ran across my mom's recipe. Buttery, pecan goodness- the cookies just melt in your mouth! Making them brought back a lot of memories... I know I keep saying this but cooking with your kids and sharing treasured family recipes creates memories that will last forever. This is a great batter to mix up and keep in the fridge or freezer. Just slice and bake as needed!
 

OLD FASHIONED PECAN SANDIES

Prep Time: 20 minutes     Cook Time: 19-22 minutes

Yield: 3-4 dozen, depending on size

INGREDIENTS

2 cups unsalted butter, room temperature (4 sticks /  1 pound of butter)

1/2 cup granulated sugar

1/4 cup Confectioners sugar, sifted

2 tablespoons cold water

1 tablespoon plus 1 teaspoon vanilla

1/4 teaspoon almond extract (optional)

4 cups all-purpose flour

2 cups chopped pecans

DIRECTIONS:

Preheat oven to 325 degrees. Line a baking sheet with parchment paper.

Before you start, know this is a dense dough. If it is crumbly, do not be tempted to add more liquid or butter. Use your hands to shape it; mold it into a log and chill. It WILL turn out.

Cream butter and granulated sugar together for 3 minutes on medium speed of your mixer. Reduce speed. Gradually add the Confectioners sugar, beating until light and fluffy. Increase the speed to medium and add the water and the vanilla and beat well. Reduce the speed to low and gradually add the flour. Turn off the mixer and remove from the stand. Fold in the pecans. Turn the dough out onto plastic wrap. (the dough may be crumbly; don't worry) Shape the dough with your hands and roll into a log. Chill for at least one hour.

Slice into discs. Put them onto the prepared sheet about 2” apart. Bake at 325 degrees Fahrenheit  for 15-17 minutes or until bottom of the cookie is golden. Don't allow it to brown; you simply want the edges to color. Cool on a wire rack. Dust with more Confectioners sugar, if desired.

Print Friendly and PDF

RECIPE: HOW TO MAKE HOMEMADE LIMONCELLO

Have you ever been to Italy? Specifically, have you ever been to Capri or the Amalfi coast? If you have, you probably remember the lemons and you've probably experienced limoncello,  a luscious lemon liqueur. The Italians typically serve it after dinner as a digestive or with flaky Italian pastries or rich desserts. I am a big fan of limoncello. Not only does it remind me of a wonderful summer in Italy a lot of years ago, it is a fast and easy ingredient for cocktails and even for a super quick dessert. Pour chilled limoncello over pound cake and berries, over vanilla ice cream, or add it to your store bought lemonade or iced tea. Makes a great addition to an Arnold Palmer!

I keep a bottle in the freezer for late afternoon summer sipping.... takes me right back to Italy.  When I first learned to make limoncello, you could not find it in the stores. Nowadays, you can find it readily but it is so much more fun to make your own. Make a double batch and give it as a gift! It's a wonderful summer tradition. I got this recipe from an Italian friend a few years ago and tweaked it until I got it just right. You do not have to use the vanilla bean; that's my own spin.

A couple of important notes: you have to take care to get rid of the white pith of the lemon rind. It becomes bitter in the distilling process. Also, you can use grain alcohol instead of vodka. I've made it both ways and simply prefer the vodka version but there is not a disenable difference in taste or cost. Select thick skinned lemons that are fully yellow with no green or soft spots on the exterior. Typically, I prefer lemons with a thinner skin when juicing, but the thicker, dense peel is better for zesting.

HOMEMADE LIMONCELLO

INGREDIENTS

20 fresh lemons

2 750ml bottles vodka (use 100 proof, if possible)

4 cups granulated sugar

5 cups water

2 vanilla beans- split with seeds removed (optional but yummy)

DIRECTIONS:

Wash the lemons well. Use a brush to remove any wax or residue on the peel. Pat dry. Peel the lemons using a vegetable peeler. Use only the outer part of the lemon rind. Try not to remove the white pith, If you do, take a sharp pairing knife and remove as much of it as possible; discard. Reserve the lemons for another use like lemon marmalade or fresh lemonade that you can freeze for a few weeks, if necessary.

Put the lemon peel into a large glass container, like a Mason jar, a large pickle jar, or a pitcher with a tight-fitting lid. Add the vodka or grain alcohol. If you are adding the vanilla bean, add it now. Split the bean and using the back of your knife, remove the seeds by scraping the bean. Add to the jar and secure the lid tightly. Allow to sit undisturbed at room temperature in a dark place for ten days. Do not disturb the mixture or stir. Just wait patiently as the vodka soaks up the yummy lemon flavor.

On the 11th day, make a simple syrup by combining the water and sugar in a pan over medium heat. Stir occasionally until sugar completely dissolves. Allow to cool completely.

Pour the simple syrup over the lemon peel/vodka mixture. Cover and allow to stand at room temperature for at least 24 hours but the preference would be to let it stand for at least another 10 but no longer than 20 days; the longer you allow it to stand, the better the flavor will be.

Strain the liquid to remove the peel and the vanilla bean, if you used it. Pour the liqueur into pretty bottles with a stopper or tight-fitting lid. Seal tightly and refrigerate. If you don't have a fine mesh strainer, line colander with a coffee filter as a quick substitute.

Chill well before serving. The limoncello should be very cold. You may even store them in the freezer to extend the prime flavor.

Serve very cold; in tall shot glasses or cordial glasses.

And as they say in Italy... "No poem was ever written by a drinker of water." - From the great Roman poet Horace around 65 BC. 

Salute!

MAKE ICED TEA AT HOME, Y'ALL!

It is hard to imagine... most people buy tea already made from the store these days rather than make it at home. I confess, I do buy tea already made when I'm on the road or when I'm in a hurry or I simply need a ton of it. But iced tea is so good when it is freshly made and poured over the ice when it is still barely warm. It is one of the cheapest and most versatile beverages you can make for a party and also one of the most refreshing! For those of you who have never tried to make iced tea yourself, here's the how-to. You may never buy a gallon of tea at the store again.

016ae8d9b4e198933c5e3c6750b7f49ba7c379c42c.jpg

HOW TO MAKE ICED TEA

For a quart of tea you need a 1-quart tea bag and 4 cups cold water. Put the water in a pot or large saucepan. Bring to a boil. Remove from heat. Drop in the tea bag. Let steep for 7 minutes. Discard the tea bag and let the tea cool completely.

To serve: Pour over ice. Add sugar, simple syrup, lemon, or mint, to taste. Ahhhh.

MAKE YOUR OWN SIMPLE SYRUP

I prefer using simple syrup to sweeten my iced tea and that way guests can adjust the sweetness to their own taste. Making simple syrup could not be easier. It is equal parts sugar to water.

INGREDIENTS

1 cup sugar

1 cup water

DIRECTIONS:

Put the sugar into a pot with cold water. Stir to help dissolve. Over medium-high heat, bring just to a boil and immediately remove from the heat. Allow to cool completely. Pour into Mason jar. It will keep in the fridge for at least 2-3 weeks.

Print Friendly and PDF