PARTY THEME: HOST A SPRING PLANTING PARTY AND BUILD A GARDEN!

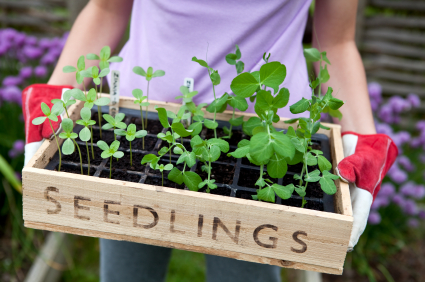
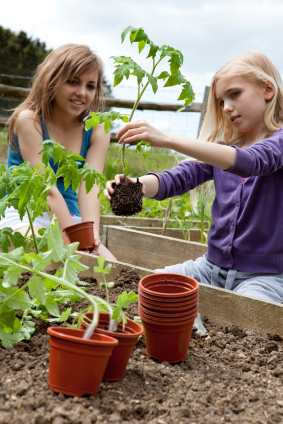
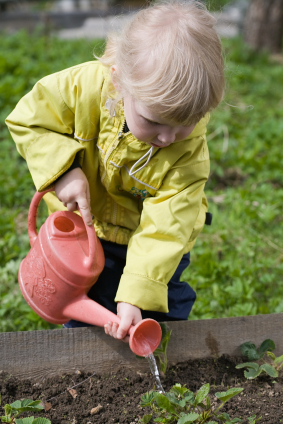
Need a great party plan for SPRING? When the weather starts to get warm, most of us are ready to freshen up outdoor spaces or get the garden started after a long winter. My Planting Party is one of my very favorite party ideas. It is not only fun- my number one criteria for a party- but it's also a great way to get kids and adults together to grow vegetables which will result in greater interest in healthier eating and the benefits will  continue to grow and grow! Any occasion is right for a planting party: a birthday, wedding, bridal shower or wedding party at your house, neighborhood party, family reunion, or community garden day. You really don't need a reason to host a planting party. It's one of those do-good, feel good types of parties that I love!

Other dates to consider are Earth Day (April 22) and Arbor Day (the last week of April in most states) coming up and Mother's Day.  Wouldn't it be wonderful to makeover your mom's patio or yard with some colorful new flowering or vegetable plants? Get my ideas for a spring yard makeover get-together...

GETTING STARTED

Many schools, youth organizations, and neighborhoods are growing community gardens. But if you don't have that movement happening in your area, start one! You don't need a lot of people. You can start small. Ask a couple of neighbors to participate and split the cost and the responsibilities of maintenance.

There are plenty of sites with information on community gardens including tips on everything from getting started to funding. First you'll need a site. Once you have that, the rest is easy.

AMERICAN COMMUNITY GARDENING ASSOCIATION

URBAN HARVEST

ABC NEWS: HOW TO START A COMMUNITY GARDEN

THE PARTY PLAN

Think old-timey barn raising-- remember when neighbors would help a family build a barn? Friends would show up with tools and the barn would go up. The family would feed the guests or everyone would bring pot-luck. This is the same premise. Invite friends to come build a garden or plant an existing space.

GUEST LIST

If it is a community garden, invite the neighbors who will want to share in the chores and in the results. Start small; with one or two families. Once the garden is established, you can add to it each year and the planting party becomes an annual event.

If it is your own backyard garden, promise friends some of the harvest in return for lunch and a fun day outside. If the party is for a birthday or Mother's Day, guests can bring plants as gifts or contribute to a fund to supply them.

SUPPLIES

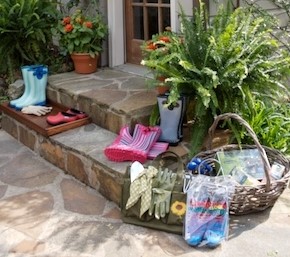
Provide all the tools you will need to plant and ask guests to bring what they have, too. You will want to have the ground tilled and prepared before guests arrive. Tillers can be rented in many home improvement or equipment rental stores. You will want to have a "survival kit" for guests including sunscreen, bug spray, wipes, bandanas, and inexpensive gardening gloves. You can find all of these supplies at the dollar store.

FOOD AND DRINKS

The host provides lunch and plenty of cold beverages. Keep it simple. Offer a picnic menu of sandwiches, a chilled salad, some fruit, and some homemade treats. My salad in a jar is perfect for a quick lunch on work day. You can prep in advance and store in the fridge or a cooler until it's time to eat. Put the dressing in the bottom of the jar. Guests simply shake it up and grab a fork. Get the how-to for my salad in a jar...

Have some Popsicles on hand for a mid-afternoon treat and for the adults, my Sangria Pops are refreshing and fun. Get the recipe for my Sangria Popsicles...

A big dispenser with chilled water, lemonade, and/or Sweet Tea (I'm from the South where Sweet Tea is essential) will keep everyone hydrated and happy. Plus, the serve-yourself option always makes hostess duties easier. Or, if you don't have a large dispenser, fill up a tub, wheelbarrow, or large planter with ice and chill your favorite beverages. I personally like the wheelbarrow because you can move it around easier. As the sun shifts, you can move the drinks into the shade so the ice won't melt.

DECORATIONS

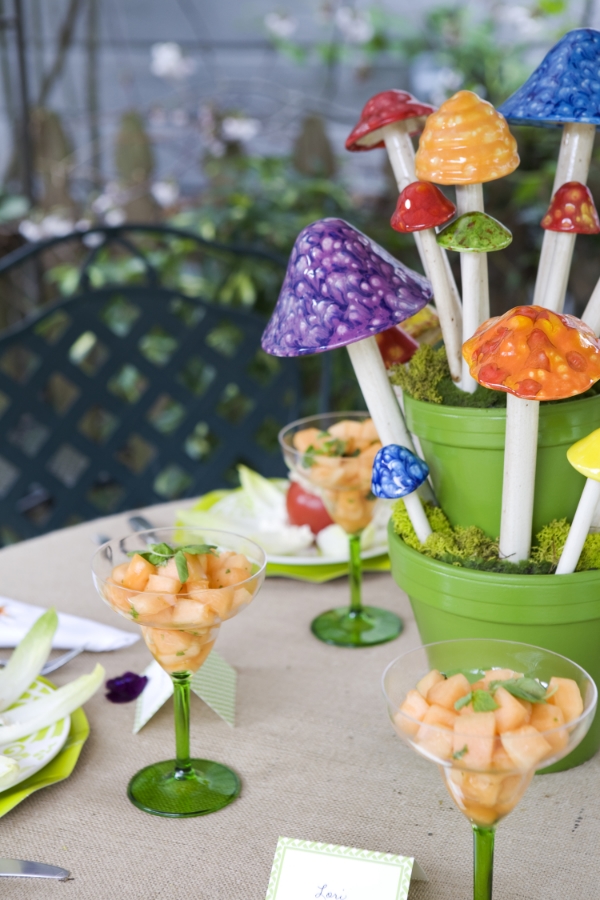
While not mandatory, decorations certainly make the event more festive. Look at the pretty decorations from our own Garden Makeover party. Garden supplies that guests can take home after the party are a great idea. I love these colorful ceramic toadstools from JJ Potts. You don't have to set the table if you have a big crowd- just let everyone serve themselves. The place settings look fancy but they are paper or melamine- very easy for clean up afterwards.

Neutral colored painter's dropcloths found at the hardware store make an easy tablecloth (even the edges are hemmed) and your flowers for the garden can be used as a centerpiece.

SALAD IN A JAR: LAYERED SPINACH AND STRAWBERRY SALAD WITH POPPYSEED DRESSING

This is one of my all-time favorite party recipes...  Serving guests a salad in a Jar is so easy, so versatile and it can be used for so many different occasions. In fact, it is also perfect for lunch on the go or for the kids. Layer your favorite ingredients in a jar and chill. When you are ready to serve, simply shake it up. That's it!

If you are going to prep the day before your event, you probably should add the dressing just before serving so everything doesn't get soggy and just put it right on top. But you can prep up to four hours before with the dressing in the bottom and you'll be fine... but keep the jars chilled on ice, in the fridge, or in a cooler. And it is a perfect solution for picnics, too!

So pretty, so functional and so delicious! Layered salad in a jar makes serving and eating salad at a party so much easier! No grappling with tongs or trying to balance everything to add dressing.

So pretty, so functional and so delicious! Layered salad in a jar makes serving and eating salad at a party so much easier! No grappling with tongs or trying to balance everything to add dressing.

LAYERED SPINACH AND STRAWBERRY SALAD IN A JAR WITH HOMEMADE POPPYSEED DRESSING

Makes 6

INGREDIENTS

1- 9 ounce package of fresh baby spinach leaves, wash and remove the stems

1- 16 ounce container fresh strawberries, washed, dried, hulled, and sliced

1- 15 ounce can Mandarin orange slices, drained

2 cups walnuts, toasted and roughly chopped

1- 6 ounce container Belle Chevre Belle and the Bee Breakfast goat cheese (or if you cannot find it, make your own by swirling honey into goat cheese to make it creamy and slightly sweet)

Poppyseed Dressing recipe  (or your favorite dressing

DIRECTIONS:

Start by spooning about 2-3 tablespoons of dressing into the bottom of the jar. Use enough so you can see the layer of dressing. Next, add about 1 1/2 cups of the spinach leaves. Layer the strawberry slices around the outside of the jar and work your way in so they look pretty. Do the same with the orange slices. Next, add the walnuts and top with a thin layer of the goat cheese. You want to be able to see each layer- the colorful layers is what is so pretty about this salad. Secure the lid and chill until serving time.


HOMEMADE POPPYSEED DRESSING

One of my summer favorites, this is also a delicious dip or dressing for fresh fruit.

INGREDIENTS

1 1/2 tablespoons apple cider vinegar

1/2 teaspoon dry mustard

1/2 teaspoon honey

1/4 teaspoon lemon juice

1/8 teaspoon Kosher salt

1/4 teaspoon sugar

1/8 cup sweet white onion, like a Vidalia, chopped

1/2 cup plain yogurt (some people prefer mayo instead)

2 1/2 tablespoons vegetable oil

3/4 teaspoon poppyseeds

a bit of water to thin, if desired

DIRECTIONS:

Add everything but the oil and the poppyseeds into a blender or food processor and blend until very smooth and there is no trace of the onion. Reduce to the lowest speed and stream in the vegetable oil. Turn off the blender and add the poppyseeds. If you find it too thick (which I love for fruit) you can thin with a bit of water for salad dressing.  I use an immersion blender for this recipe. It's fast and easy to clean up.

Print Friendly and PDF

RECIPE: MARTIE'S BEER CAN CHICKEN

Planning a get-together to kick off grilling season? My Beer Can Chicken is juicy, tender and full of smoky flavor. The bird stays super moist from the steam created from sitting perched atop an open beer can. You want the bird to sit squarely on the can so smaller birds, about 3 pounds,  tend to work best. I use the actual beer cans for grilling my chickens but you can use a vertical chicken roaster that is far more stable than trying to keep the birds balanced on a can. If you don't want to use beer--you can use a can of lemonade---the carbonated fizzy kind of lemonade works best and the Shandy or Arnold Palmer varieties work well also. The recipe starts with the rub; make mine or use your own favorite rub. This BBQ rub recipe is great on ribs, too.

MARTIE'S BEER CAN CHICKEN

INGREDIENTS

1 whole chicken (3-4 pounds)

1 large can beer per chicken

1 tablespoon vegetable oil per chicken

2 tablespoons unslated butter, room temperature

BBQ RUB:

2 tablespoons brown sugar

1/4 cup paprika

2 teaspoon cayenne pepper

1 teaspoon granulated sugar

2 teaspoon kosher salt

1 1/2 teaspoon dry mustard

1 teaspoon black pepper

1 teaspoon garlic powder

1 teaspoon onion powder

1 teaspoon celery salt

1/4 teaspoon chipotle pepper

Mix all ingredients together in a bowl or zip top bag.

DIRECTIONS:

Mix all rub ingredients together in a bowl or zip top bag. Will keep in a cool place for up to two months.

Add 1/2 tablespoon of rub to the butter and mix together well.

For the chicken: Trim excess skin or fat from each bird. Remove and do whatever the heck you want with any "giblets" or packages you get with a whole bird. Wash and rinse the chicken under cold water and pat dry. A

Rub the bird with one tablespoon vegetable oil. This helps the skin crisp and holds the rub.

Spoon a tablespoon of the rub mixture into the cavity of the bird and rub it in well. Gently separate the skin from the flesh and rub the butter mixture onto the bird without tearing the skin. Rub another tablespoon of the rub mixture onto the skin of the bird. Do not cover but refrigerate for at least two hours and up to 24 hours before grilling.  Remove the chicken from the fridge one hour before grilling to take the chill off.

LOW & SLOW GRILLING ON INDIRECT HEAT

Light the grill. Once the coals are medium heat, push them around the edges of the grill leaving the center open. I always put a grill pan in the middle. Since we're cooking LOW & SLOW, you may need to have extra coals available if you are using charcoal. I keep mine in a chimney style charcoal starter. If you are using gas, it is easy to keep the temperature consistent. Keep a mister or water bottle on hand to shoot down any hot spots that flare up.

Open the beer and pour out about 1 cup. Add 2 tablespoons lemon juice to it and put in a mister to occasionally mist the bird while cooking, if you like.

Push the chicken down onto the beer can and place on the grill. Push the bird down onto the can so the legs help prop it up sort of like a camera tripod. I use a leave-in digital meat thermometer when I cook any kind of meat but especially chicken. That is the best way to get a perfect bird. Follow the directions for the type of thermometer you have. 

Close the lid and try to resist peaking but you will want to monitor the heat and the temperature carefully in case of flare-ups because there is sugar in the rub which can cause it to burn if you have the heat too high. Don't rush the process. The birds will take about 1 1/2 -2 hours to cook depending on size and heat. 

The perfect internal temperature for chicken is 165 degrees. I cook mine to 160 degrees then remove it from the heat and allow it to rest, uncovered,  for at least 15 minutes before carving. It will "carry over cook" up to 165 degrees  during the resting time. 

Serve with my Chimichurri- it is  soooo good! Get the recipe...

TIP: Be food safe when cooking and grilling outdoors! Go to the USDA's "Ask Karen" website for more information on recommended safe cooking temperatures for meat and poultry and learn more about grilling from BBQ Pitmaster and Memphis in May champion Chris Lilly. Read more...

Print Friendly and PDF