There are all kinds of techniques for dying Easter eggs... and since the creation of Pinterest, it seems Easter eggs are more and more creative each year. I particularly love the natural look of "straight from the hen house" speckled eggs and the technique is very easy to master. Here's the how-to for easy, natural speckled Easter eggs:
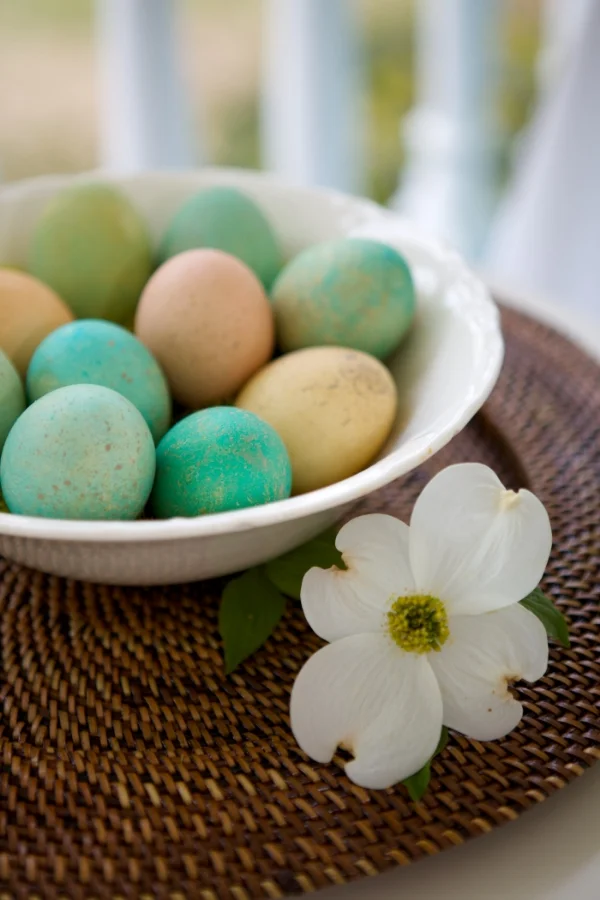
How to easily dye speckled Easter eggs. Photo credit: Arden Photography Location: The Sonnet House Leeds, Alabama
SUPPLIES
Newspaper or something to protect the work surface
Hard-boiled eggs or blown out eggs (I made both)
Easter egg dye- there are tons of brands. Pick one or you can use food coloring or veggies to create a natural dye*
2 black tea bags
Plastic cups
Brown craft paint
Old toothbrush
Rubber or plastic gloves
DIRECTIONS:
Create a drying rack of some sort. I used the top of a Styrofoam cooler and some toothpicks for mine. Push in 4 toothpicks and let the eggs rest on top. But you have to rotate them so they don't have a big drip mark on the bottom side. You can also use a circle of tin foil on newspaper. You can use straight pins and a foam board also.
Cover the work surface with newspaper or Kraft paper. Boil 1 cup of water and add tea bags to steep to make a strong, dark tea. While the tea is steeping, boil eggs as you normally would for dying. As they are cooling, mix dye according to package directions.
Natural looking speckled eggs look best colored pale blue, aqua, pale green, soft tan, and even violet or pale pink. (Yes, hens do lay pink eggs, I promise! ) To achieve a natural look for tan eggs, use the tea to dye the eggs. I also used a small amount of the tea to muddy the bright color of the dye to make a more natural look. Feel free to adjust the colors until you get the dye the color you want. You can re-dip them to get a darker color. I will dip then wipe with a paper towel to set a base color. Then re-dip to make a nice, pale shade.
Once you've dyed the eggs, allow them to dry completely. For the speckle effect: dip the toothbrush in a small amount of the brown craft paint and run your finger over the toothbrush, causing the paint to splatter onto the eggs. A random pattern looks good- but keep it very light for best results. Allow to dry and you've got natural looking speckled eggs.
No matter which way you color your eggs, I hope you create lots of fun memories for you and your family. Happy Easter!