RECIPE: BAKED PITA CHIPS AND CHARRED ONION DIP

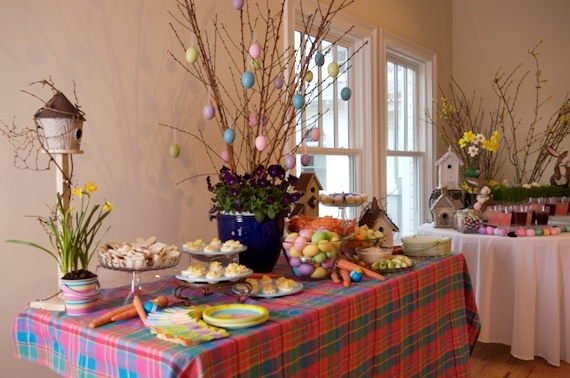
To me, there’s nothing that says party like chips and dip. Take the typical chips and dip to a new level with smoky baked pita chips and my charred three onion dip. Better make a double batch! I like making this recipe for Super Bowl Sunday or game days in front of the TV because you can make it in advance and it tastes even better. Plus, it is easy to double or tripe for a big crowd. Note: Instead of putting out a huge bowl, I recommend using smaller serving bowls. Fill 2-3 bowls and cover with plastic wrap. Keep chilled until you need to replenish.

super bowl favorite recipes charred onion dip and homemade baked pita chips

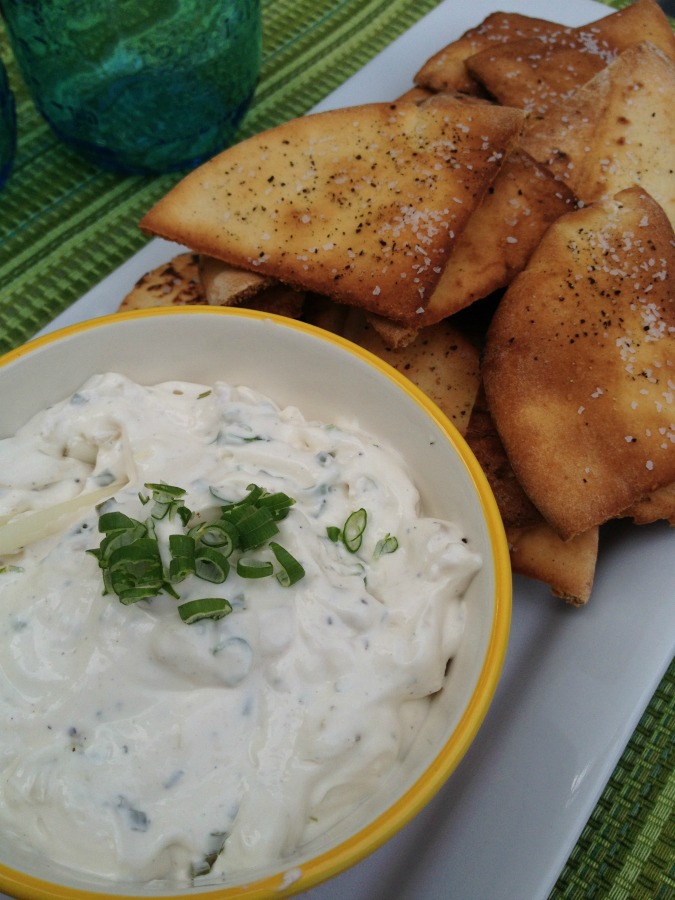
BAKED PITA CHIPS WITH THREE ONION DIP

Difficulty: Easy

Prep Time: 20 minutes plus 30 minutes chill time

Cook Time: 10 minutes

INGREDIENTS

3 tablespoons olive oil

½ teaspoon smoked paprika

¼ teaspoon garlic powder

1 tablespoon kosher salt-divided

¼ teaspoon cracked black pepper

8 pita bread rounds

 DIRECTIONS:

Preheat oven to 400 degrees

Combine all of the ingredients except ½ tablespoon of the salt in a small bowl. Whisk together. Brush on the first pita, stack the next one and repeat until you have 4 pitas. Repeat, making a second stack. Use a knife to cut the stack into eight wedges. Repeat with the second stack. Arrange the chips in a single layer on a baking sheet. Bake for 10 minutes or until golden and toasted.

Sprinkle the chips with the remaining salt as soon as you remove them from the oven.


CHARRED ONION DIP

INGREDIENTS

1 small red onion

6 scallions, save some of the green tops for garnish

1 cup Mascarpone cheese

2 cups sour cream

1 teaspoon chives

1 teaspoon onion powder

¼ tablespoon fresh lemon juice

½ tablespoon kosher salt

¼ teaspoon cracked black pepper

1 ½ teaspoons Worcestershire

Dash Tabasco

 DIRECTIONS:

Slice the onion into 4 wedges. Heat and  very lightly oil a grill pan. Cook the onions and scallions until they are softened and the outside is nice and charred. Cool. Using a food processor, mince the scallions and onion. Add the remaining ingredients and mix together. Chill for at least 30 minutes before serving. This one tastes best 4-8 hours after you mix it up so the flavors can fully develop.

Yield: 3 cups

Print Friendly and PDF

WEDDINGS TRENDS: VARIATIONS ON A GUEST BOOK

A Bible, guitar, a cookbook, even Jenga game blocks! Brides and grooms are coming up with unique and creative ways to remember their wedding day by asking guests to forego signing a typical guest book in favor of something more personal to them. My good friends at The Sonnet House, one of my favorite wedding and event venues (located in Leeds, Alabama) have shared some wonderful and personal variations on the traditional wedding guest book. Here are some of my favorites...

Photo by Alisha Crossley Photography at The Sonnet House Leeds, Alabama

Photo by Alisha Crossley Photography at The Sonnet House Leeds, Alabama

This bride and groom asked their wedding guests to highlight a favorite bible verse in a family Bible and sign it. Each time they look through the Bible over the years of their marriage, they will be reminded of their wedding day and the family and friends assembled to wish them well.

Photo by Amy Carson Photography taken at The Sonnet House, Leeds, Alabama

Photo by Amy Carson Photography taken at The Sonnet House, Leeds, Alabama

This couple had their wedding guests sign a guitar which they will hang on a wall in their new home as a reminder of their wedding day.

Photo by LaShay Photography taken at The Sonnet House, Leeds, Alabama

Photo by LaShay Photography taken at The Sonnet House, Leeds, Alabama

In keeping with the selfie station trend you find at many events these days, using a Fujifilm instax™ Mini 8 camera and smartphone wireless printer, this couple had family and friends take a selfie which was printed on the spot and clothespined to a rustic board for the wedding. Later, the couple will assemble the photos into a keepsake wedding guest album. Find the camera at Michael's, Wal-Mart, Amazon, etc. From $70.

Photos by Rob and Wynter Photography taken at The Sonnet House, Leeds, Alabama

This creative couple will be able to relive their wedding day each time they pull out the Jenga blocks! If you have a large guest list, you may need to provide several games to accommodate all your guests good wishes. Afterwards, these wooden blocks can be fixed to a frame and hung as a piece of art.

Photo by SCB Photography taken at The Sonnet House, Leeds, Alabama

One of my favorite wedding guest book ideas for foodies, cooks and food lovers: have wedding guests sign pages in a favorite cookbook! Love this! Maybe one day, a bride and groom will have guests sign MY cookbook!

Many thanks to Ellen, Jared & Corey at The Sonnet House and all of the couples and photographers for the inspiration.

HOW TO FORCE SPRING BLOOMS INDOORS

In the South, we are fortunate to have fairly mild winter weather. However, sometimes Mother Nature will warm things up enough for our flowering bushes, trees, and shrubs to think it is Spring so they begin to produce young buds that cannot survive a bitter cold snap. Some of these buds will bloom and can be enjoyed indoors if you bring them in prior to the shock of the freezing temperatures. I did that yesterday with some lovely Camellia buds from my yard. I simply cut the stem and then immediately submerged it in warm water. One day later, I have blooms!

Forced blooms are very easy to do and so pretty for an early Spring or Easter arrangement. Look at these images below... looks like Spring is just about to burst out! I should have started these a bit earlier so they would be in full bloom for the party. If you are a day out and your branches have not yet bloomed fully, simply re-cut and submerge them in very warm water. That should help.

You can force blooms from your flowering shrubs like Forsythia or Hawthorne that already have budding branches to help Mother Nature along and bring a bit of early spring to your table. I Here's how:

HOW TO FORCE BLOOMS FROM FLOWERING SHRUB OR TREE BRANCHES

Supply List:

Sharp pruning shears or scissors

A large bucket

Warm water

Household bleach, like Clorox

Cut flower food

STEP 1: Prepare the bucket by filling with extremely warm water. Add 1 teaspoon household bleach and 1 tablespoon cut flower food to the water.

STEP 2: Cut and gather branches from trees, shrubs, or bushes where you can see blooms beginning to form. I always make notes in my garden journal on bloom dates so I know approximately when blooms will happen for different trees and plants. You can also look up anticipated bloom dates for different species online via your state or local agriculture association or flower clubs. Cut 12-18" lengths of branches for a stately and elegant arrangement.

STEP 3: Prepare the branches by making a fresh cut in the stem. The old school way is to crush the base of the stem to allow the plant to absorb water but I find a fresh cut with a very sharp knife or pruning shears will do the trick.

STEP 4: Immediately submerge the cut branch into the prepared water in the bucket.

STEP 5: Place the bucket with the branches in a cool room away from direct sunlight. Depending on how long it takes for the buds to open, you may need to re-cut the stems and change out the water. Once blooms begin to appear, you certainly want to use fresh water and re-cut the stems before making your arrangement. Lightly mist the blooms every other day.